















Free Azure Credits: Every Legit Option To Check First

When we first started experimenting with cloud platforms, we made the classic beginner mistake: we assumed small test projects would stay small.
Then we added a virtual machine. And a database. And storage. And logging. And, naturally, we forgot to shut half of it down.
That’s usually how people discover Azure credits—not because they planned some beautiful cloud-financing strategy, but because they looked at the pricing calculator and thought, “Okay, there has to be a cheaper way to test this.”
Luckily, there is.
What Are Azure Credits, Exactly?
Azure credits are promotional funds added to an eligible Azure subscription. Instead of charging your card immediately, Microsoft deducts the cost of supported services from your credit balance.
You can normally spend the credits on services such as:
- Virtual machines
- App hosting
- Databases
- Cloud storage
- Networking
- Serverless functions
- Analytics tools
- Selected AI services
- Development and testing environments
The important word here is credits. Microsoft is not handing you cash. You cannot withdraw the balance, move it into your bank account, or use it outside Azure.
Most credits also expire after a set period. A $1,000 balance that expires in 90 days is not the same as $1,000 you can slowly use over three years, so always check both the amount and the deadline.
Azure credits are also different from free-service allowances. For example, the regular Azure free account includes a $200 credit, but it also includes limited quantities of certain services that remain free for 12 months. Microsoft separately offers monthly free quantities for some services with no fixed one-year expiration.
That sounds slightly confusing at first, but the basic idea is simple:
- Credits pay for eligible usage until the balance or time limit runs out.
- Free service allowances cover a limited amount of usage each month.
- Anything beyond those limits may become billable if the subscription allows paid charges.
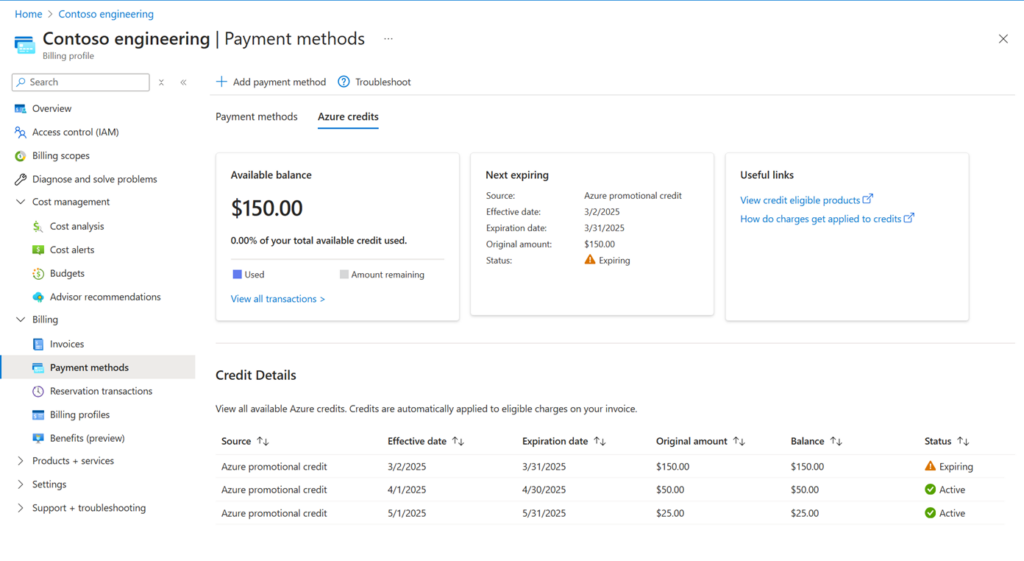
Source: Track Your Azure credit balance for a Microsoft Customer Agreement
Azure Credit Programs Compared
Here is the quick version before we get into the details.
| Program | Credit amount | Validity | Best for | Card required? |
| Azure free account | $200 | 30 days | New Azure users and quick prototypes | Yes, for verification |
| Azure for Students | $100 | 12 months | Verified college and university students | No |
| Startup credit offer | Up to $5,000 | Split across separate credit periods | Early-stage startups without an investor referral | May depend on setup |
| Investor-backed startup offer | Up to $150,000 or more for some eligible startups | Depends on the approved offer | Startups connected to participating investors or accelerators | Varies |
| Visual Studio Professional | $50 per month | Resets monthly | Individual development and testing | Included with subscription |
| Visual Studio Enterprise | $150 per month | Resets monthly | Larger development and testing workloads | Included with subscription |
| Microsoft nonprofit Azure grant | $2,000 per year | Annual | Eligible nonprofit organizations | Usually required during activation |
We would still check the official offer page before applying. Microsoft has changed these programs before, and eligibility can vary by country, organization type, and previous Azure usage.
1. Azure Free Account: $200 for Your First 30 Days
The regular Azure free account is where we would start if we had never used Azure before and just wanted to see how everything works.
You receive a $200 promotional credit that can be used during your first 30 days. You also gain access to limited monthly quantities of more than 20 popular Azure services for 12 months, plus a separate group of services with always-free monthly limits.
Microsoft explains the current free-account benefits on its Azure account pricing page.
Thirty days is not a very long time, but it is enough to test a small architecture, deploy a demo, explore the portal, or compare Azure with AWS or Google Cloud.
It is not enough time to casually forget about three running virtual machines for a month. Ask us how every cloud beginner learns that lesson.
Who can get the Azure free account?
The offer is generally available to new Azure customers.
You normally need:
- A Microsoft account
- A valid phone number
- A supported billing address
- A credit or debit card
- No previous use of the same new-customer Azure offer
The card is mainly used to verify your identity. Microsoft may place a small temporary authorization hold on it, but that is not the same as charging you for Azure services.
Prepaid and virtual cards may not work, depending on the region and issuing bank.
Will Azure automatically charge you after the trial?
Normally, the free account begins with a spending limit. When the $200 credit runs out or the 30-day period ends, Azure can disable the subscription or stop the affected services rather than automatically charging you.
You need to deliberately upgrade the account to pay-as-you-go billing before Microsoft can continue billing normal usage.
That upgrade is the point where we would slow down and read the screen carefully. Once you remove the spending limit, Azure can charge your payment method for usage that is no longer covered by promotional credits.
Microsoft explains how spending limits work in its Azure billing documentation.
How to claim the $200 Azure credit
- Open the official Azure free-account page.
- Click Start free or Try Azure for free.
- Sign in with an existing Microsoft account or create one.
- Enter your name, address, phone number, and other profile information.
- Verify your phone number by text message or automated call.
- Add a supported credit or debit card.
- Accept the Microsoft Customer Agreement.
- Create the Azure subscription.
- Open Cost Management + Billing and confirm that the promotional credit is active.
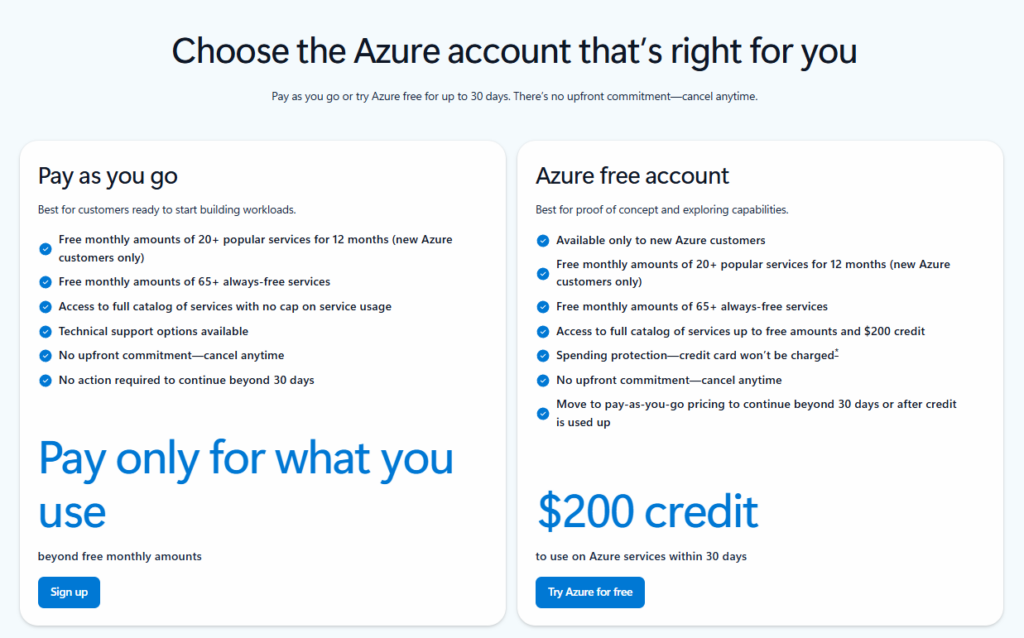
Source: Create Your Azure Free Account Or Pay As You Go | Microsoft Azure
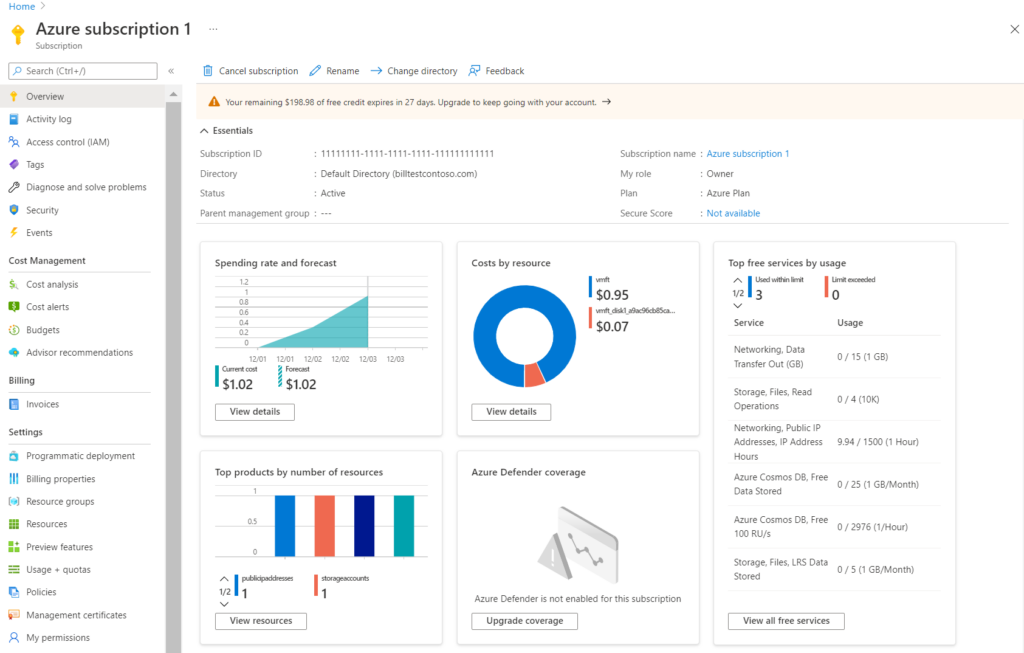
Source: Check usage of free services included with your Azure free account
What can you realistically build with $200?
Quite a lot, provided you do not choose expensive resources just because Azure lets you.
We would use this credit for things like:
- A small web application
- An API prototype
- A basic managed database
- A short AI or analytics experiment
- A temporary development environment
- A portfolio project
- A comparison between Azure services
We would not use it to launch a production application that must remain online indefinitely. The credit period is too short, and you may end up rushing into paid billing before you understand the normal monthly cost.
2. Azure for Students: $100 Without a Credit Card
Azure for Students is one of the nicest offers Microsoft provides because it removes the part students usually hate most: entering a credit card.
Eligible students receive a $100 Azure credit that remains valid for 12 months. The offer also includes access to several developer tools and selected free Azure services.
You can review the current terms on the Azure for Students page.
The $100 balance is smaller than the standard free-account credit, but you get much more time to use it. Personally, we would rather have $100 for a full year than $200 that starts evaporating the moment we activate the account.
Who qualifies for Azure for Students?
You need to be enrolled at an eligible accredited college or university and complete Microsoft’s academic-verification process.
Verification may involve:
- A university-issued email address
- Signing in through your institution
- A third-party academic-verification service
- Additional student documentation
Microsoft generally requires participants to be at least 18, although local rules may affect the exact age requirement.
A .edu email is helpful in the United States, but it is not the only possible verification method. Students outside the US may have completely different institutional email domains.
Can you renew the student credit?
Eligible students may be able to renew the offer each year while they remain enrolled and successfully verify their student status again.
That does not mean unused credit automatically carries over. If you still have $40 left when the subscription period ends, Microsoft does not necessarily turn it into $140 after renewal.
Treat each credit period separately and check the expiration date in the portal.
How to activate Azure for Students
- Go to the Azure for Students page.
- Click Start free.
- Sign in with your Microsoft account.
- Enter your school or university information.
- Complete academic verification.
- Accept the Azure terms.
- Open the Azure portal.
- Confirm that the Azure for Students subscription and $100 credit are active.
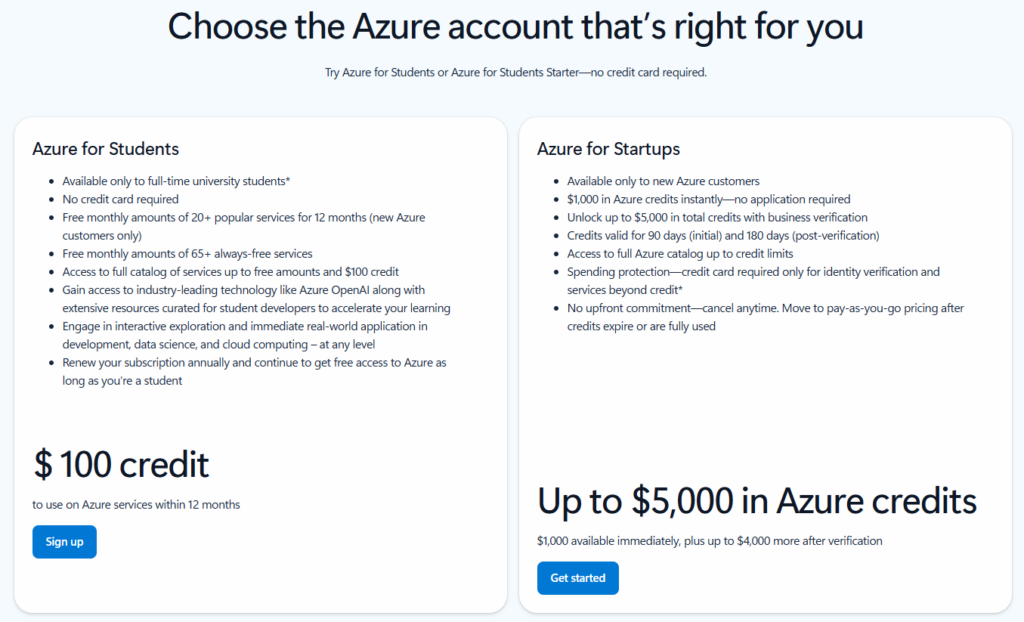
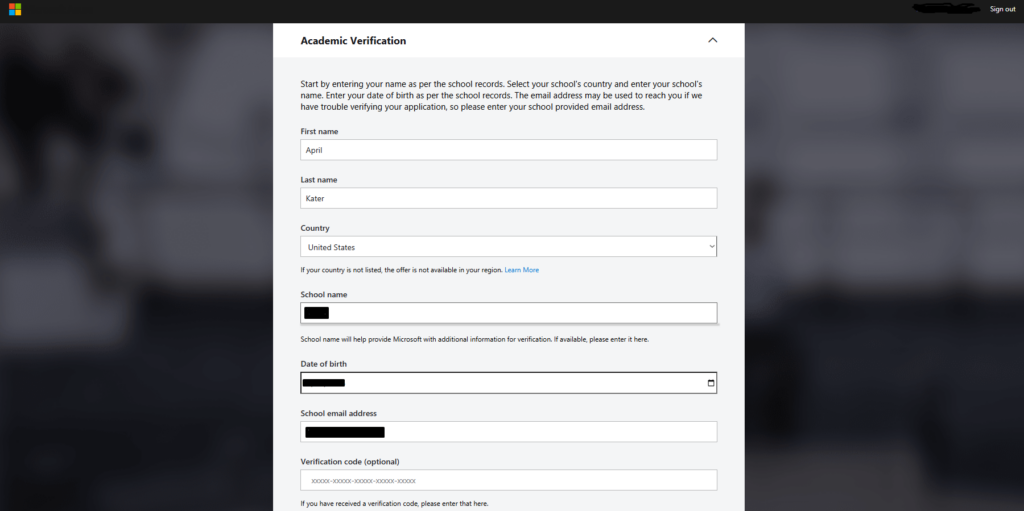
Source: Track usage and create budgets in Azure for Students
What should students use the credit for?
We would focus on projects that can be stopped, deleted, or scaled down easily.
Good options include:
- A portfolio website
- A small Flask, Django, Node.js, or .NET API
- A serverless function
- A basic SQL or NoSQL database project
- A scheduled automation
- A machine-learning demo
- A cloud-computing assignment
- A simple DevOps pipeline
The worst approach is creating a large VM, leaving it online 24/7, and assuming $100 will somehow last until graduation.
It will not.
Free virtual cards for non-EU residents
Open in 1 working day, issue 100 virtual cards, and get up to 1.25% cashback.
Get a free account
3. Azure Credits for Startups Without an Investor
This part gets confusing because many older articles still describe Microsoft for Startups using outdated levels and credit amounts.
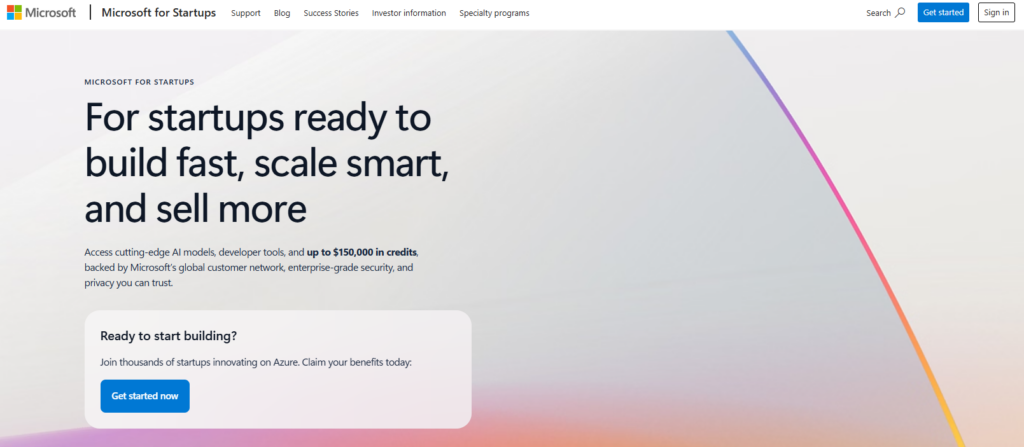
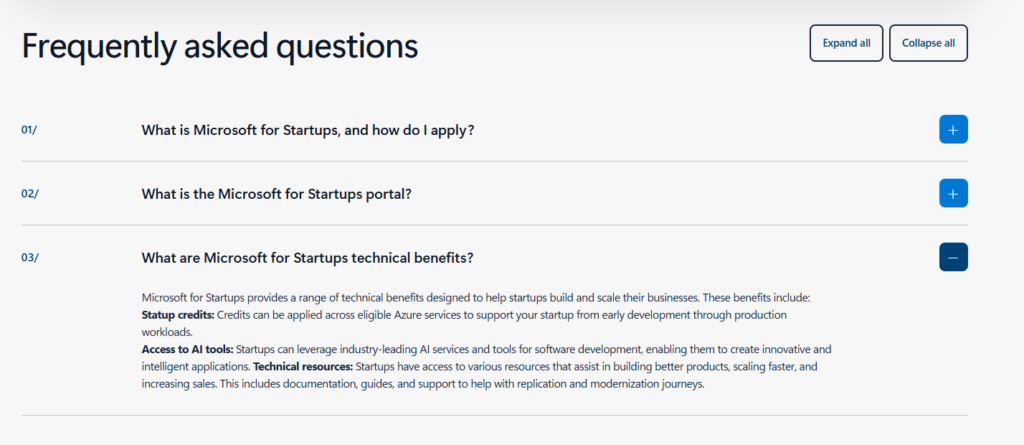
The current entry route for startups that are new to Azure can provide up to $5,000 in credits:
- An initial $1,000 credit, typically valid for 90 days
- Another $4,000 after successful business verification, typically valid for 180 days
Microsoft explains the current structure in its Microsoft for Startups FAQ.
The key phrase is up to. Registering a company does not automatically drop $5,000 into your Azure account five minutes later.
You first need to qualify, complete the application, and pass the relevant verification process.
What kind of startup qualifies?
Microsoft generally looks for privately held, for-profit companies that build and own a software-based product or service.
The startup normally needs to:
- Build its own software product
- Own the product’s intellectual property
- Operate in a supported country
- Remain below the program’s funding-stage limit
- Meet Microsoft’s previous-credit restrictions
- Pass business verification
- Comply with the program’s acceptable-use rules
Microsoft excludes or limits some organization types, such as:
- Consulting companies
- Development agencies building only for clients
- Government organizations
- Schools and educational institutions
- Cryptocurrency-mining businesses
- Organizations without their own software product
That distinction matters. Saying “we are a technology company” is not enough if the business mainly sells consulting hours.
Do you need venture capital?
No. You can apply for the entry-level startup offer without venture-capital funding or an investor referral.
This is useful for bootstrapped founders who have a product idea, prototype, or MVP but have not raised money yet.
However, the much larger Azure credit offers are usually connected to additional verification, program progression, or participation in Microsoft’s investor network. We will cover that separately in the next section.
How to apply for startup credits
- Open Microsoft for Startups.
- Click Get started.
- Sign in with the requested Microsoft account.
- Enter your company name, location, website, and contact information.
- Describe your product and target users.
- Explain how you plan to use Azure.
- Create or connect the required Azure account.
- Submit the startup application.
- Complete business verification.
- Check the startup dashboard for available benefits and expiration dates.
Microsoft says many applications are reviewed within a few business days, but incomplete company information or failed verification can make the process longer.
What should you write in the application?
We would keep the description clear and specific. Explain:
- What the product does
- Who uses it
- What problem it solves
- Whether you have an MVP
- Whether you have test users or paying customers
- Which Azure services you plan to use
- Why your company owns the technology
- What stage the startup is currently in
A weak description sounds like this:
We are building a revolutionary AI ecosystem that transforms the future of digital innovation.
That sentence says almost nothing. A much better version would be:
We are building a document-processing platform for accounting teams. The product extracts invoice data, validates totals, and sends structured records to existing finance software. We plan to use Azure App Service, Azure SQL Database, Blob Storage, and Azure AI Document Intelligence.
The second version tells Microsoft what the company builds and why Azure is relevant.
4. Investor-Backed Startup Credits: Up to $150,000 or More
This is the offer that gets all the attention.
You may see Microsoft promote Azure credits worth up to $150,000, and in some cases even larger benefit packages for startups connected to participating investors.
That does not mean every startup applicant receives $150,000.
The larger credit packages are generally tied to:
- Business verification
- Startup stage
- Product progress
- Existing Azure usage
- Funding status
- Participation in Microsoft’s Investor Network
- A referral from an eligible investor or accelerator
Microsoft describes the available startup benefits on its Microsoft for Startups benefits page.
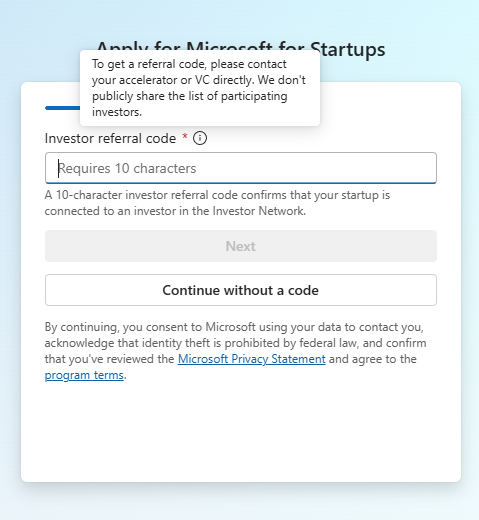
What is an investor referral code?
Microsoft works with participating venture funds, accelerators, incubators, and other startup organizations.
An eligible organization may provide its portfolio companies with a referral code. That code helps Microsoft confirm that the startup is associated with an approved partner and may unlock access to larger credit packages or additional support.
You cannot usually create one yourself. You need to receive it from the investor, accelerator, or startup organization.
Does a referral guarantee $150,000?
No. A referral may give you access to a better offer, but Microsoft can still consider:
- Company eligibility
- Funding stage
- Previous Azure credits
- Product type
- Program availability
- Verification results
- The specific agreement with the investor
Always base your infrastructure budget on the amount that has actually been approved, not the largest number printed on the landing page.
Questions we would ask before relying on startup credits
Before building an entire company around promotional Azure funding, we would confirm:
- How much credit is currently active?
- When does it expire?
- Is more credit guaranteed or only potentially available?
- Which Azure services are excluded?
- What happens after the balance reaches zero?
- Can the subscription move to pay-as-you-go?
- How much will the same architecture cost without credits?
That final question is the uncomfortable one.
A cloud setup may look perfectly affordable while Microsoft is covering the bill. Then the promotion expires, and suddenly the startup has a $4,000 monthly infrastructure cost with twelve users.
Credits should help you prove the business works. They should not hide the fact that the business cannot afford its own architecture.
5. Visual Studio Azure Credits: $50 to $150 per Month
If you already have a paid Visual Studio subscription, check the benefits page before buying anything else.
Visual Studio Professional subscribers may receive a $50 monthly Azure credit, while Visual Studio Enterprise subscribers may receive $150 per month.
Microsoft lists the current subscriber offer on its Visual Studio Azure credit page.
These credits reset each month. You cannot save six months of unused credit and suddenly deploy a $900 environment in December.
What can Visual Studio credits be used for?
The benefit is intended for individual development and testing.
We would use it for:
- Temporary development environments
- Software testing
- Small demonstration projects
- Database experiments
- Reproducing bugs
- Learning Azure tools
- Short build workloads
- Internal prototypes
We would not use it for a permanent production application serving real customers.
Microsoft’s subscriber offer does not provide the same production guarantees as a standard paid Azure subscription, and the benefit is tied to the individual subscriber.
How to activate the benefit
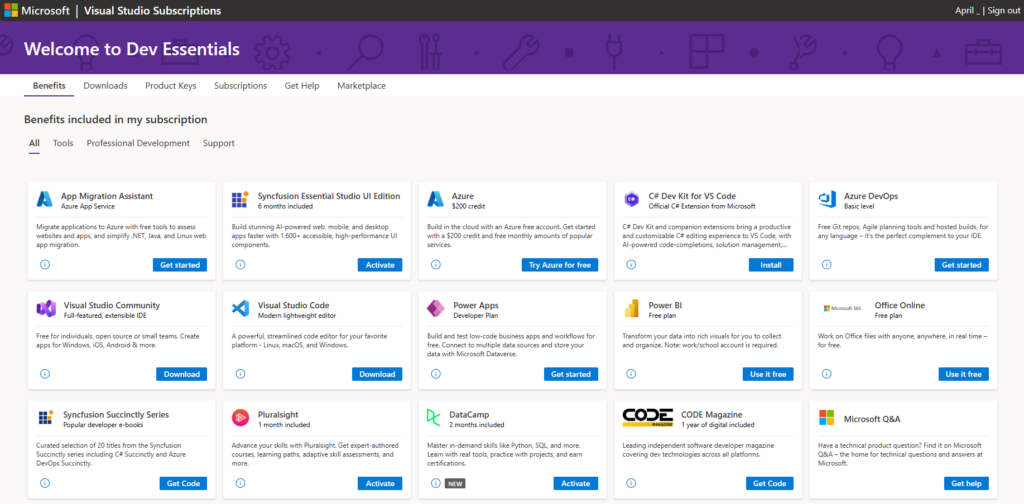
- Sign in to the Visual Studio subscriber portal.
- Open the Benefits tab.
- Find the Azure credit benefit.
- Click Activate.
- Sign in with the Microsoft account you want to connect.
- Complete the Azure subscription setup.
- Confirm the monthly credit and spending limit in the Azure portal.
6. Microsoft Nonprofit Azure Grant: $2,000 per Year
Eligible nonprofit organizations can receive a $2,000 annual Azure grant.
We are highlighting the current amount because plenty of older articles still list $3,500. Microsoft reduced the grant for applicable renewals, so relying on an old number can create a very awkward budget meeting.
Microsoft documents changes to nonprofit benefits in its Microsoft for Nonprofits updates.
Who qualifies?
The organization normally needs to:
- Hold recognized nonprofit or charitable status
- Operate in a supported country
- Complete Microsoft’s nonprofit validation
- Meet Microsoft’s mission and eligibility requirements
- Remain compliant with program rules
- Renew or reconfirm eligibility when required
Microsoft may use a third-party partner to verify the organization’s legal status.
Being approved for discounted Microsoft 365 plans does not always mean the Azure grant is automatically active. You may still need to claim and configure the Azure benefit separately.
Is a card required?
Usually, yes.
Microsoft may ask for a card when the Azure subscription is activated. The grant covers eligible usage up to the available balance, but charges beyond the grant may become billable if the subscription is configured to allow them.
We would set up cost alerts immediately. Nonprofits do not need the surprise of discovering that a forgotten test server ate the annual grant in six weeks.
How to activate the nonprofit grant
- Register the organization through Microsoft for Nonprofits.
- Submit the required legal and organizational information.
- Complete nonprofit verification.
- Open the Microsoft Nonprofit Hub.
- Find the Azure grant benefit.
- Click Activate.
- Accept the Azure sponsorship terms.
- Create the Azure subscription.
- Add the required billing method.
- Set budgets and cost alerts before deploying anything.
How to Check Your Remaining Azure Credit
We would check the balance regularly, especially during the first few weeks of a new project.
In the Azure portal:
- Open Cost Management + Billing.
- Select the correct billing scope.
- Choose the relevant subscription.
- Open Credits, Cost analysis, or the sponsorship balance page.
- Review the remaining amount.
- Check the expiration date.
- Look at the forecasted cost.
The exact menu can vary by subscription type. A startup sponsorship may display information differently from a regular free account or Visual Studio benefit.
Do not look only at the balance. You can have $2,000 left and still be in trouble if it expires on Friday.
Azure cost data may also appear with a delay. The amount shown in the portal is useful, but it is not always a perfectly live cash register.
Do Azure Budgets Actually Stop Spending?
No. This catches a lot of people.
An Azure budget tracks your costs and sends alerts when you reach certain thresholds. It does not automatically stop resources just because the budget reaches 100%.
Microsoft explains this clearly in its Azure budget documentation.
Here is the difference:
- A budget sends notifications.
- A spending limit can disable an eligible credit-backed subscription.
- A quota limits a specific technical resource.
- An automation rule can respond to an alert and perform an action.
We normally recommend setting alerts at:
- 50%
- 75%
- 90%
- 100%
We would also add a forecasted-cost alert. An actual-cost alert tells you that the money has already been spent. A forecast alert gives you a chance to fix the problem first.
How We Would Make Azure Credits Last Longer
The fastest way to waste cloud credit is to treat it like fake money.
It is not fake. Someone is simply paying the bill for you temporarily.
Recent cloud-cost research supports the scale of the problem. Flexera’s 2026 State of the Cloud report — a survey of 753 cloud decision-makers, published in March 2026 — found that estimated wasted cloud spend rose to 29%, the first increase in five years after a steady decline, driven largely by the cost complexity of AI workloads. That figure is self-reported: it reflects what organizations themselves estimate is wasted, not an independent audit, so treat it as directional rather than precise. Still, a mainstream FinOps benchmark landing at roughly three in ten dollars wasted is a useful gut-check for anyone assuming a small promotional credit is somehow immune to the same problem. The FinOps Foundation’s own guidance echoes this, consistently ranking workload rightsizing and waste elimination among the top priorities cloud teams report each year..
That research fits here because the same problems that waste enterprise cloud budgets also destroy small promotional balances: idle resources, oversized infrastructure, weak monitoring, and nobody checking what is still running.
1. Create a budget before deploying anything
We would make this the first task after activating the subscription.
Go to:
Cost Management + Billing → Cost Management → Budgets
Set the budget slightly below your total credit. If you have $200, you might create alerts around $100, $150, and $180 rather than waiting until all $200 is gone.
2. Turn on VM auto-shutdown
Virtual machines are probably the easiest way to destroy a small credit balance.
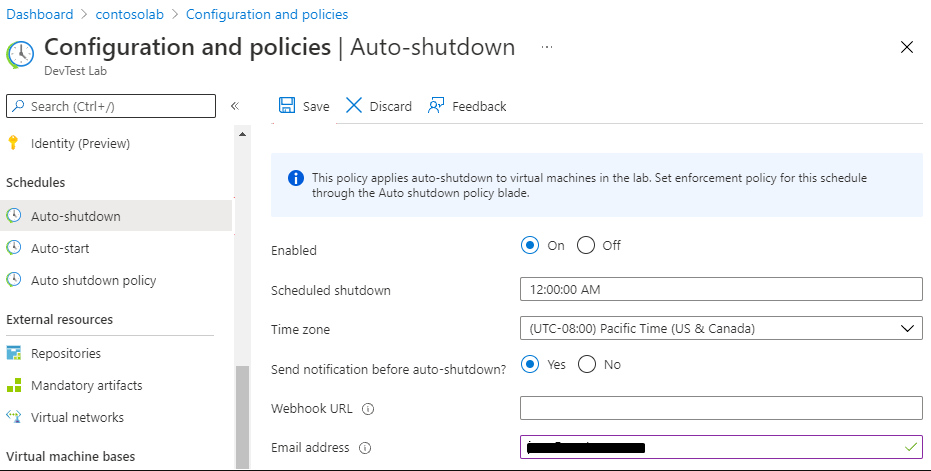
Azure includes an auto-shutdown feature that can stop a VM at a chosen time each day. Microsoft explains how to configure it in its VM auto-shutdown guide.
We would enable it for every development VM unless there is a specific reason not to.
3. Make sure the VM is actually deallocated
Turning off Windows or Linux inside the virtual machine does not always mean Azure has stopped charging for compute.
Check the VM status in the Azure portal. It should say:
Stopped (deallocated)
You may still pay for disks, backups, public IP addresses, or other connected resources, but the main compute charge should stop once the VM is properly deallocated.
4. Delete resources you no longer use
Removing an application does not always remove every cloud resource created for it.
We would regularly search for:
- Unattached managed disks
- Old snapshots
- Empty test databases
- Unused public IP addresses
- Forgotten network interfaces
- Old backup vaults
- Test load balancers
- Duplicate resource groups
- Unused storage accounts
- Abandoned development environments
Azure resources have a habit of sticking around like boxes after a move. You think you cleaned everything, and then six months later you discover three mystery disks in a corner.
5. Use serverless services for occasional workloads
A serverless function can be cheaper than a VM when the code only runs occasionally.
For example, if an application processes one file every few hours, keeping a full virtual machine online all day may make little sense.
Still, serverless does not mean “impossible to charge.” You may pay for executions, storage, logging, databases, networking, and connected services.
Use the pricing calculator instead of trusting the word “serverless” to magically protect your balance.
6. Watch your logging costs
Logging feels harmless because each individual log message is tiny.
Then your application writes thousands of debug entries every hour, retains them for months, and suddenly monitoring has become one of the most expensive parts of the project.
Review:
- Log ingestion
- Retention periods
- Debug logging
- Application Insights usage
- Diagnostic settings
- Metrics and traces
- Archived monitoring data
Keep the data you actually need. You probably do not need six months of verbose debug logs from a temporary test API.
7. Check Azure Advisor
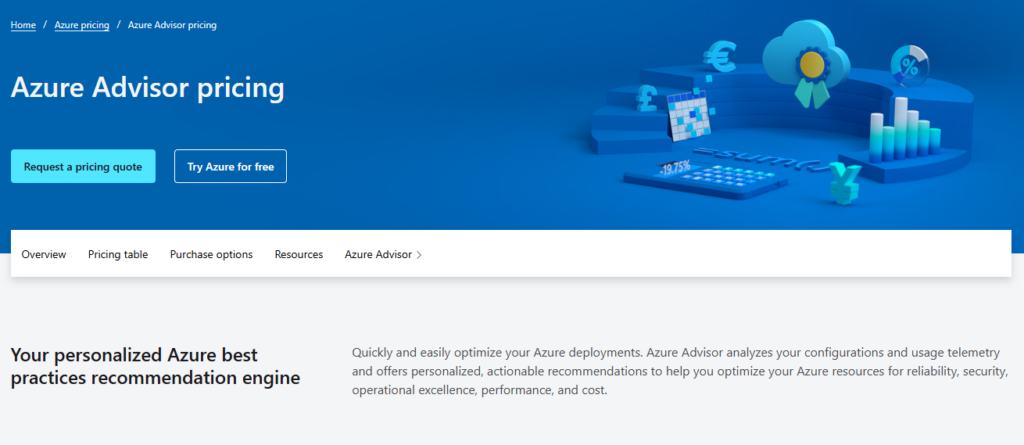
Azure Advisor can identify underused or idle resources and suggest ways to reduce costs.
Microsoft documents the available recommendations in its Azure Advisor cost guide.
We would use the recommendations as a starting point, not blindly accept every one.
A VM with low average CPU use may still need extra capacity during a weekly traffic spike. Azure sees usage data, but it does not always understand the business reason behind it.
8. Compare Azure regions
The same resource may cost different amounts depending on the Azure region.
Before deploying, compare:
- Service price
- Service availability
- Latency
- Data-residency requirements
- Compliance rules
- Network-transfer costs
- Disaster-recovery needs
We would not place a customer database on another continent just to save a few dollars. Cheap infrastructure is not helpful when the application becomes slow or violates a data-storage requirement.
9. Use the Azure Pricing Calculator
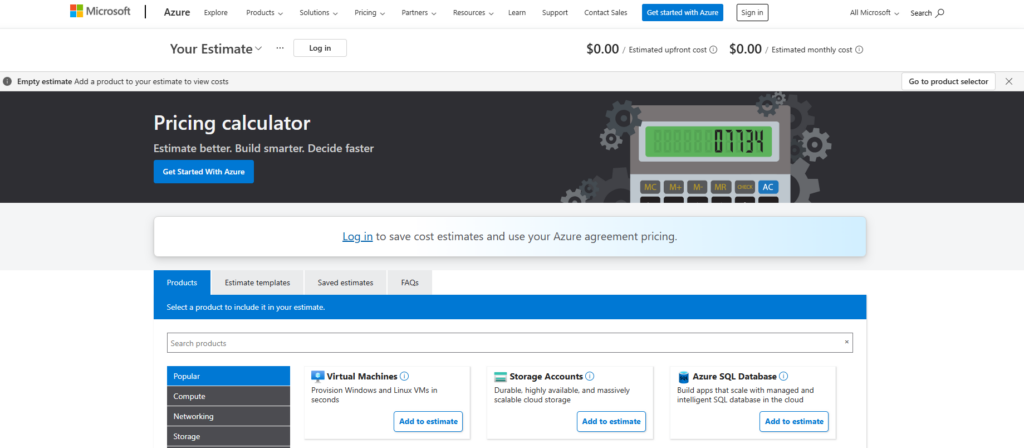
Before spending any credit, estimate what the architecture would cost at regular pay-as-you-go rates.
Include:
- Compute
- Operating-system licensing
- Managed disks
- Databases
- Storage
- Backups
- Monitoring
- Public IP addresses
- Load balancers
- Data transfer
- AI requests or token usage
- Support plans
The question we always want answered is not:
Can the credit cover this?
It is:
Can we afford this after the credit disappears?
10. Do not commit to reservations too early
Azure reservations and savings plans can reduce the price of eligible workloads, but they involve a longer commitment.
They make sense for stable systems that you know will keep running. They make much less sense for an MVP that may be rebuilt next month.
Microsoft recommends rightsizing workloads and reducing waste before purchasing long-term commitments. Otherwise, you may lock yourself into discounted capacity that you did not need in the first place.
What Usually Burns Through Azure Credits?
Based on the pricing structure, the usual suspects are:
- Oversized VMs
- VMs left online overnight
- Premium managed disks
- High-tier databases
- Excessive logging
- Long data-retention periods
- Frequent AI-model calls
- Outbound bandwidth
- Duplicate test environments
- Forgotten snapshots
- Managed Kubernetes clusters
- Resources deployed in expensive regions
Kubernetes deserves its own warning.
A managed Kubernetes control plane may look inexpensive, but the worker nodes, disks, networking, monitoring, load balancers, and public IP addresses still cost money.
For a small prototype, Kubernetes can be the cloud equivalent of renting an entire restaurant because you wanted to make one sandwich.
What Happens When Azure Credits Expire?
The result depends on the type of subscription.
Azure may:
- Disable the subscription
- Stop running resources
- Ask you to upgrade
- Start pay-as-you-go billing after an approved upgrade
- Reset a monthly Visual Studio allowance
- End the sponsorship
- Require resources to be moved to another subscription
Microsoft explains the possible subscription states in its Azure subscription status documentation.
Do not wait until the final day to deal with this. Before the credits expire:
- Export important data.
- Back up databases.
- Review every active resource.
- Calculate the normal paid cost.
- Delete unused services.
- Decide whether to upgrade or migrate.
- Confirm what happens to the subscription.
- Check whether the offer renews.
- Document the architecture.
- Save any access keys or configuration details you legitimately need.
Which Azure Credit Program Should You Choose?
Here is how we would decide:
- You have never used Azure: Start with the $200 free account.
- You are a verified student: Use Azure for Students and avoid the card requirement.
- You are building an early software startup: Apply for the entry-level startup credits.
- You work with an investor or accelerator: Ask whether it participates in Microsoft’s Investor Network.
- You already pay for Visual Studio: Activate the monthly Azure benefit.
- You run an eligible nonprofit: Apply for Microsoft nonprofit validation and claim the annual grant.
You may qualify for different programs at different stages, but do not create multiple accounts to repeatedly claim new-customer promotions. Microsoft can review previous usage, identities, payment methods, and organization history.
Are Azure Credits Actually Worth It?
Yes. Very much so. They give you time to learn, experiment, build an MVP, test infrastructure, and discover expensive mistakes before those mistakes start coming directly from your bank account.
But we would never treat credits as a permanent business model.
A cloud architecture that only works while Microsoft pays for it does not really work. It is simply enjoying a temporary sponsored holiday.
Use the credit period to answer practical questions:
- Does the product work?
- Do users want it?
- Which services are truly necessary?
- Where is the money being spent?
- Can the architecture be simplified?
- What will normal monthly billing look like?
- Can the business afford it?
That is where Azure credits become genuinely valuable. They do not just save money. They give you room to make better technical decisions before the real invoice arrives.
Why This Guide
We didn’t write this from memory or recycle numbers from older roundups. Every credit amount, eligibility rule, and expiration window above was checked against Microsoft’s own current documentation, and where the numbers had changed, we rewrote the guidance to match — not just the figure.
What we checked, page by page:
- Azure free account terms – verified against the Azure account pricing page and the billing/spending-limit documentation, to confirm the $200/30-day structure and what actually happens when the limit is hit (subscription pause, not silent overcharging).
- Azure for Students – checked against the official Azure for Students page and the usage/budget tracking docs, including how renewal actually works (it doesn’t stack unused credit).
- Startup credits – cross-referenced the Microsoft for Startups FAQ and benefits page to separate the no-investor entry tier ($1,000 + $4,000) from the investor-referral tier (up to $150,000+), since most older articles conflate the two.
- Visual Studio subscriber credits – confirmed current monthly amounts ($50 Professional / $150 Enterprise) directly on the Visual Studio Azure credit page.
- Nonprofit grant – this is where the check actually mattered: the Microsoft for Nonprofits updates page confirms the annual Azure grant is now $2,000, down from the $3,500 figure still circulating in a lot of older guides. We flagged this explicitly in the article rather than quietly using the new number, because a stale figure here could throw off a real nonprofit’s budget planning.
- Cost controls (budgets, auto-shutdown, Advisor) – verified against the Azure budgets documentation, VM auto-shutdown guide, and Azure Advisor cost recommendations – specifically to confirm that a budget alert does not stop spending automatically, which is a common and expensive misunderstanding.
- Subscription expiration behavior – confirmed against the Azure subscription states documentation to describe accurately what happens to resources when a credit period ends (disabled, not deleted outright).
- Broader waste context – supplemented with Flexera’s State of the Cloud survey data and FinOps Foundation priorities to explain why credit waste isn’t a hypothetical risk but a well-documented pattern even at enterprise scale.
Why this matters for you: Microsoft changes these programs more often than most guides admit – tier structures, dollar amounts, and eligibility rules have all shifted in the past couple of years, and the nonprofit grant cut is a clear example of an old number that’s still actively misleading people. Where we found a discrepancy between commonly repeated figures and current official documentation, we used the current one and noted the change, rather than silently updating it.
One honest caveat: Microsoft can and does adjust these offers without much notice, and eligibility varies by country and account history in ways that aren’t always fully documented publicly. So treat this as a strong starting point – verified as of this writing – and always confirm current terms on the official offer page before applying, since we can’t promise Microsoft won’t change something the week after this is published.
Our first-hand experience is concentrated on the startup credit programs (Section 3 and 4): we’ve processed applications on behalf of real startups, so the eligibility criteria, verification steps, and common rejection reasons in those sections reflect what we’ve actually seen happen, not just what the program page says.
For the other programs — the Azure free account, Azure for Students, Visual Studio subscriber credits, and the nonprofit grant — we have not personally activated each one ourselves. Those sections are built from Microsoft’s current official documentation, cross-checked line by line, rather than hands-on testing. We’ve been explicit about that distinction here rather than let the opening story imply otherwise.
If anything in those sections doesn’t match what you experience when you actually activate one of these offers, we want to know — Microsoft’s own portal flow is the final source of truth, and we’ll correct this guide if it’s out of date.
About The Author Team
This guide is maintained by the team at Spendbase, a spend-management platform for startups that also runs its own Azure and AWS credit application service. We work with early-stage companies daily to apply for cloud credits, negotiate SaaS discounts, and manage procurement — which is exactly why we track these programs closely: eligibility rules, tier structures, and dollar amounts change often, and getting them wrong costs founders real money and time.
Spendbase is headquartered in Lewes, Delaware, with additional offices in London, Tallinn, Kyiv, Delhi, Singapore, and Hong Kong. The company holds ISO, SOC 2, GDPR, and PCI DSS compliance certifications, and its digital banking products are issued in partnership with regulated financial institutions in the US, UK, and EU.
Where our expertise comes from: beyond the free guide you’re reading, Spendbase also runs a hands-on Azure credit application service for startups — reviewing eligibility, handling paperwork, and submitting applications directly to Microsoft’s programs. That operational experience is what informs the eligibility details and program comparisons in this article.
You might want to read

Cost optimization
AWS Grants: Credits, Rules, FinOps (2026)AWS grants can feel like free money, until you realize they're really non-dilutive capital...



 EN
EN  ES
ES  PT
PT  DE
DE  FR
FR  TR
TR